How to: Build The Debris Hut
The debris hut is one of the fastest and easiest shelters you can make with no tools or special equipment. The concept in construction is very much like the way some animals, like squirrels, build their homes or nests. Depending upon how well it is constructed it is a very snug, warm and dry shelter good for tempratures ranging from well below -10°F to 90°F even without fire or proper clothing.
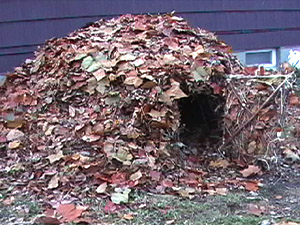
It is constructed out of debris found on the forest floor. The debris can be anything from dirt, snow, leaves, pine needles or anything that will trap insulating dead-air space. In fact, more debris = warmth, so you can never pile on too much debris. The debris forms the insulating layer that keeps the heat (your body heat) inside the structure, and so keeps you warm. Actually, the picture above is of a debris hut I made out of pine needles with Phragmite door embellishments.
As a rule where cold and/or wet conditions exits and hypothermia may be a risk, at least 24" of debris covering the top and sides is required.
Debris Hut Insulation Chart
Amt (ft) to Temp (F)
- 36" (approx. 3') down to 30°F
- 48" (approx. 4') down to 0°F
- 54" (approx. 5') down to -20°F
- 66" (approx. 6') down to -40°F
You enter this type of shelter feet first and you may even bring in extra debris to pack around you once inside. Use debris on the floor for as a pad for sleeping and to retain body heat that can be lost by laying on the cold bare ground.
Mark your debris hut so you can find it from the outside easily. The nature of the debris hut is that it blends in perfectly with the surroundings. If someone is trying to find you they will have a hard time seeing your hut.
If you are concerned about creepy-crawlies that live in the debris or may take up residence in your hut simply smudge the inside of your debris hut out with braided sage or a leafy branch for about 15-30mins.
WARNING: Since the Debris Hut is essentially a giant tinder bundle, NEVER build a fire inside your debris hut. Make sure your fire is well away from your hut.
Instructions
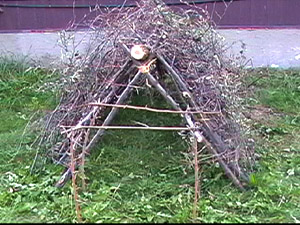
1). Add ribbing with stout sticks along both sides of tripod. This ribbing should be as wide as your body. Once you find a proper spot to build your shelter it will help to lay down and outline yourself for proper demensions.
This is starting to look like a prehistoric skeleton.

2). Lash a tripod-like frame. The long pole should be as long as your body plus one arm length. This frame structure was strong enough to support my weight, roughly 200lbs!

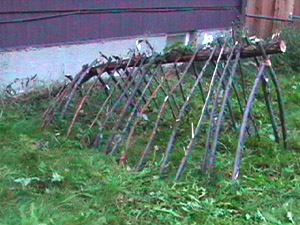
3). Start laying latice work. You will need small branches and twigs.