Deer hoof rattles are used by Indigenous tribes throughout the Americas. The rattles are used for different purposes, depending on the tribe.
The Salish (Flatheads) of Montana use it in the hysterical cures of the blue jay shaman's dance in bison-calling rites. In the West they are associated with girl's puberty ceremonies. Deer hoof rattles can also be used to invoke oneness with the spirit of Mother Earth. The rattles stimulate the animal energy and brings one closer in balance with nature.
The deer hoof rattle is made of bunches of deer hooves fastened to indigenous wood. To personalize the rattles, people can use animal fur, feathers, yarn, or beads. Some people also paint the inside of the hoof.[1]
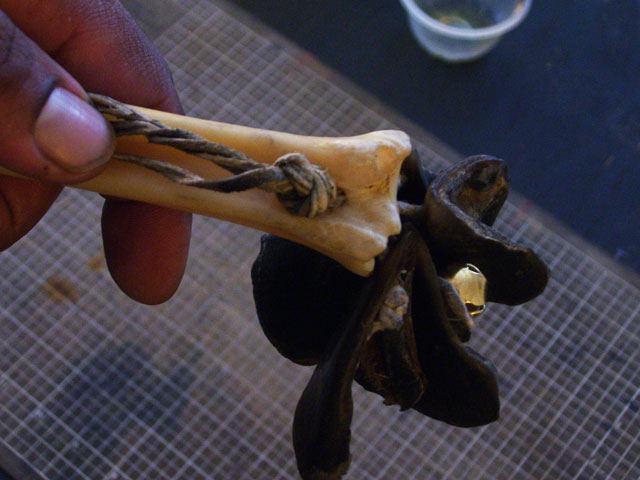
In my representation, I fasten the hooves and other embellishments to the cannon (shin or forearm) bone of the deer. The hollowed out bone has a particular resonance
as the hooves strike it when shook.
Citation
1). Nah Tah Wahsh PSA, Molly. "Deer Hoof Rattle." A Virtual Tour of the National Museum of the American Indian Exhibitions
Creation�s Journey and All Roads Are Good >> http://nmai.si.edu/exhibitions/all_roads_are_good/DeerHoofRattle.htm, 01/29/2013
A handle - here, I am using a cannon bone of the deer
Cordage - I am using buckskin cordage
A means to drill - if I had a few days to create this I could use a pump-drill, or hand-drill. But, for speed I will cheat
and use a power-drill.
Also, files and sandpaper come in handy to smooth and shape the hooves and bone - sandstone or abrasive rock or sand would work in completely primitive scenario.
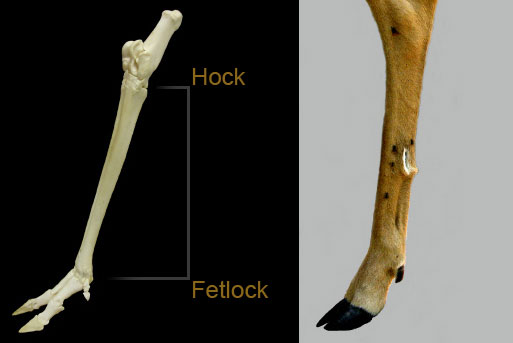
2). Here is a diagram of the anatomy of the hind leg of a white-tailed deer. The top part is called the hock and the bottom, where the
toes fit on is called the fetlock
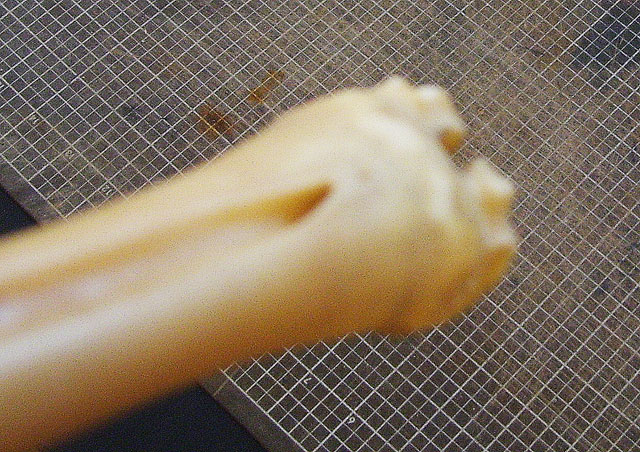
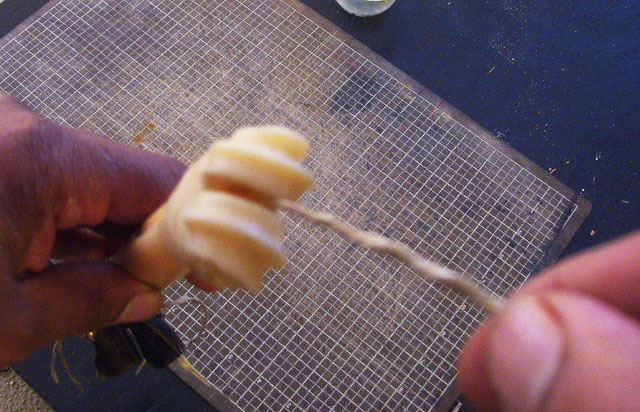
3). This is the top view looking into the bone from the hock. This is where the marrow would be but has been cleaned out by boiling the bone
for a few hours. I widened the natural hole that is there...
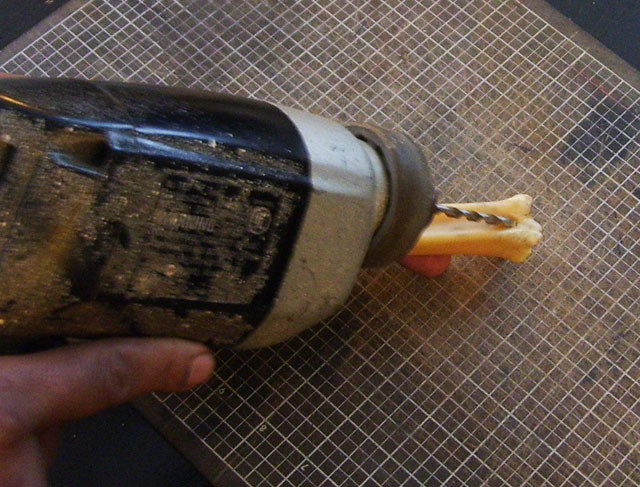
4). On the front of the cannon bone is a small depression with a hole that leads into and out to the hock....drill a hole there at an angle. Here I used an
11/16 drill bit.
5). You should be able to widen the natural hole at the base of the hock.
6). At the base of the fetlock or bottom of the bone is a hole that comes out the center of the joint...
7). If you look closely you can see the hole. We are going to use this to apply a tether or hand-loop.
8). I will be using buckskin for the tether, fringe, and wrap. Buckskin cordage can be difficult to thread through
small spaces when dry...it is better to snip the ends at a sharp angle, then to wet and twist. It is even better to harden the tip a bit. This can be done with
wax or hide-glue (Elmer's Glue), or egg white - here I am sharpening and moistening the tips of my cordage with egg-white
it dries, sticky, and hard...but brittle, and can be worked off with rubbing and twisting once the cordage
has been threaded.
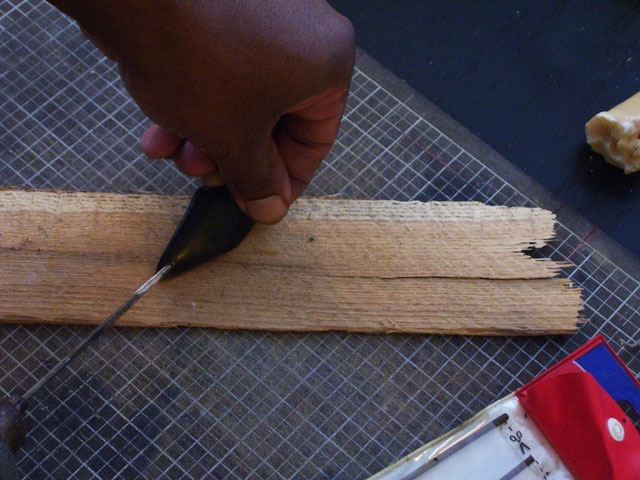
9). Now drill the holes in hooves. Hooves are really the animal's fingernails and can be shaped and more easily worked when
boiled awhile to be pliable; so drilling while malleable might be easier, especially with a pump-drill or hand-drill.
But, this time I am using a 1/16 drill bit to get a hole started on the inside dip of the hoof.
10). Drill it from the front side to be sure of alignment.
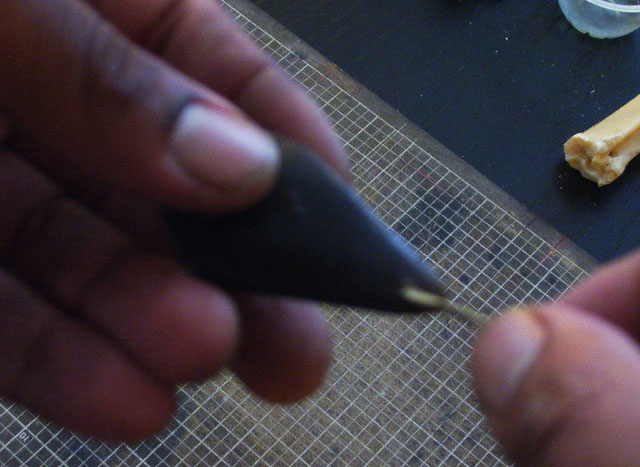
11). Once drilled through with the small bit use a slightly larger bit to widen the whole. I did not have the next size up a 5/64, so
decided to CAREFULLY bore the whole wider with a square mini-file
12). Drill it from the front side to be sure of alignment and to widen the hole.
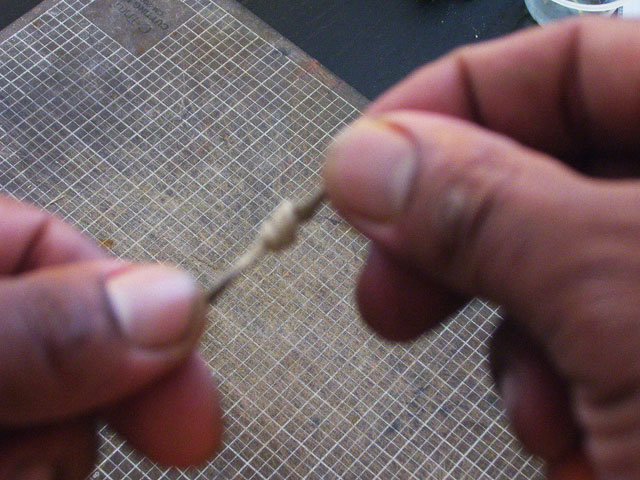
13). Now with the egg-white treated end of your buckskin cordage thread the hoof from the tip....
14). Once threaded through tie a double or triple-overhand not as a stopper
15). I used a Double-Overhand Knot
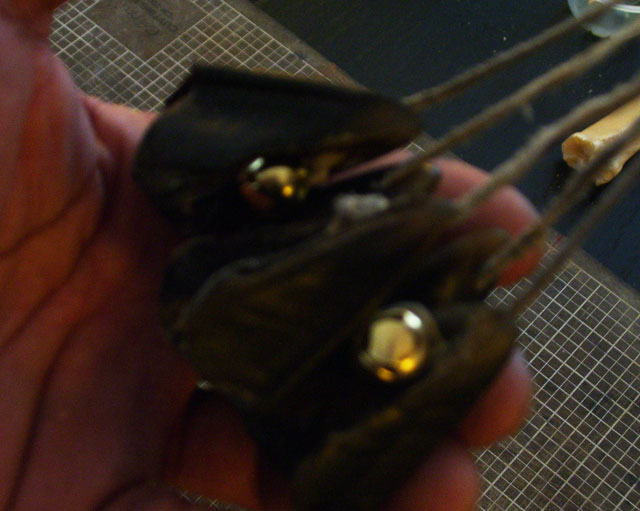
16). If you want your rattle to be "fancy" add some small bells to the cordage once threaded through the hoof with a Half Blood-Knot.
17). Here is bell attached..
18). And threaded through.
19). Repeat the drilling, threading and knotting (then adding of embellishments if desired) to the rest of the
20). Now the hard part...attaching the hooves to the bone handle. Make sure all the bases of the hooves are even, and the length of cordage is the same.
21). Twist them together and treat with egg-white to stiffen the tip. After the tips have hardened a bit, thread the tip through the
top of the bone or the hock...
22). Out through the hole you widened earlier...
23). Make a simple Overhand Knot or Figure-8 Knot as a stopper...
24). Buckskin cordage holds pretty well and can be tied tightly, but can also be worked loose with a little water.
This makes the repair, and the addition of more hooves easy.
25). Now the other hard part...adding the tether or wrist loop. Treat the tip of a length of cordage with glue or egg-white, when the cordage stiffens, carefully thread it in
between the fetlock joint...
26). Be careful NOT to pull all your cordage through...
27). Here I am extending my hand to be sure the tether is going to be wide enough for my hand to fit
through comfortably.
28). The hand-loop is on. I embellished it by adding a wood bead being sure to add and overhand knot so it does not slip out.
he free end has been knotted and will be used to attach more embellishments or hang free as fringe. At this stage your
rattle is fully operational. You could decorate the bone handle any way you want with paints, dyes, scoring, burning, or
leaving it plain - which I tend to be partial to...sometimes.
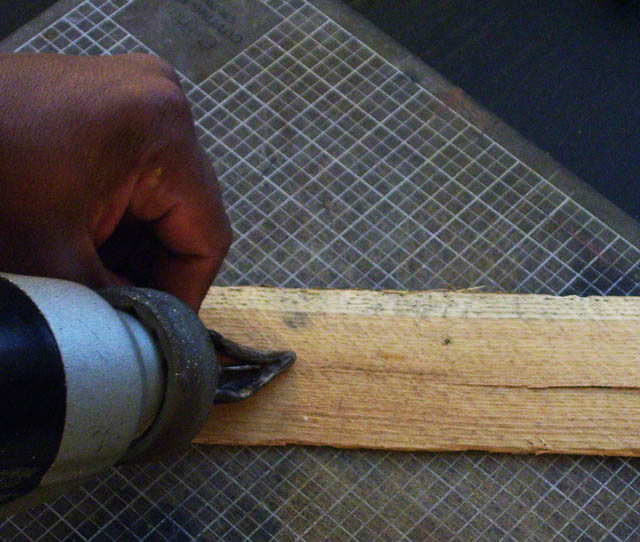
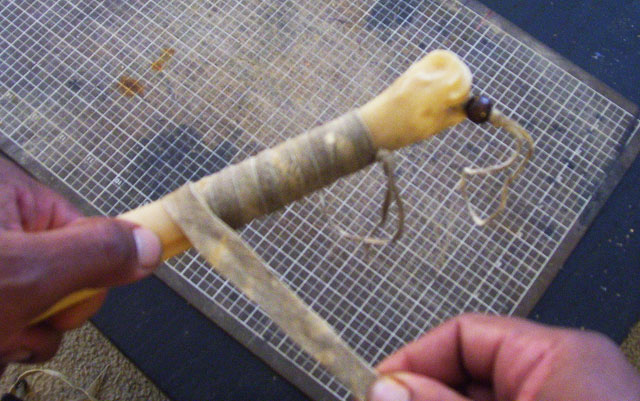
29). But I am going to go further and at least wrap the handle. Here is a buckskin scrap that I am spiral-cutting to create
my handle wrap. I am cutting it to be about 3/8" wide.
30). The size of buckskin I started with yielded me 46" length of wrap at 3/8" wide. This is the usual way I make cordage from
rawhide or buckskin or any type of fabric is by spiral-cutting.
31). Now I wrap tightly starting from the fetlock or the bottom of the rattle handle towards the top.
32). At the top I can tie my wrapping off or glue it down with hide-glue, or whatever adhesive you choose...I am not finish with
the handle treatment I want so I am just using egg-white to hold the end down.
33). The finished deer hoof rattle.
34). I embellished by continuing the wrap with black walnut dyed buckskin cordage, wood beads,
I eliminated the original tether I had in mind and create a hand-loop from the dyed wrap, then added turkey feathers to the ends
of the original hand-loop ends.