How to: Brain-Tan Buckskin (Dry Scrape Method)
Posted: 2017-08-12 18:09:40
- Likes: {{ likes }}
Hard work but the one of the moste enjoyable end-products one could ever hope to complete.
So what exactly is braintan? Braintan, which is sometimes known as "native tan," refers to a natural process of tanning the hide. Unlike commercial tanning, no chemicals or machines are involved. Each is hand-tanned using a time consuming and labor intensive process.
First, the fat is scraped from the skin and the hair is removed. Then a mixture of brains and water is applied to the skin and it is allowed to soak for some time. The mixture is removed and the hide is stretched and dried. It is then worked by hand using a beam or other object to soften it up. The entire process takes many hours over several days.
Instructions

1). The Essentials: Day 1
On a nice couple of days preferably above 70degrees…
- You will need a raw deer hide.
- Hide scraper-the one shown here was purchased from BrainTan.com
- Cordage-clothes line cordage works fine
- Sharp knife and/or a utility blade
- 4 2x4’s approximately 61/2’ long; Nails or screws & a
hammer – to create a frame
- Artificial sinew or real sinew, or heavy-duty waxed thread
- Glover’s needle or heavy-duty leather needle
- Old jeans or sweat pants or canvas fabric
- Pumice stone or medium-grit sand paper
- Dry leaves or grass clippings about a lawn bag full for 2 hides; punky wood– for smoking.

2).
- Bucket or large stock pot
- 2gals of water, and of course, last but not least...
- the brains from the animal or 1lbs of pork brains from the local supermarket
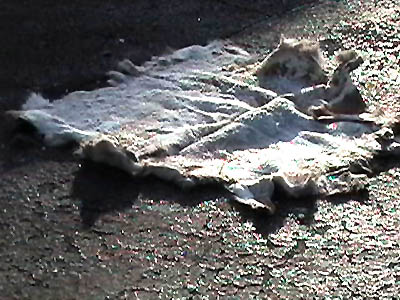
3). If the hide has been properly preserved via freezing and/or salting. Un-thaw and/or thoroughly rinse off the salt. If the hide has been stored salted in a box and not in a lawn bag or frozen then it may be stiff. You can re-hydrated and rinse the salt of by letting the hide soak in a large bucket of water for a couple of hours or over night. This will also help loosen up the hair, making it easier to remove it when it comes time.

4). At this stage I will take the time to look over the hide for possible problems like holes from bullet or arrow wounds, score marks from removing the hide from the carcass, as well as weak or very thin areas. I then trim any unwanted or unnecessary pieces from the main body of the hide; I like to work with as rectangular a piece as possible. Others may not trim at all. This is optional.
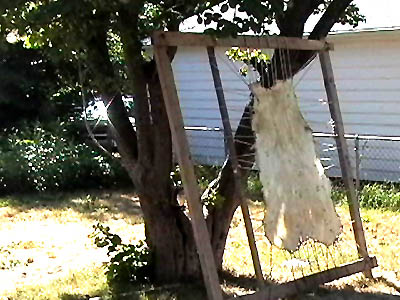
5). After building the frame into a 6’x6’ square, lay the hide out with in it to be sure it will fit. Sometimes it is best to have extra lumber to make a smaller rack if needed. Place the edge of the hide against the wood, flesh-side up. Using your knife, make slits that are parallel to the edge of the hide by sticking the knife tip down in the desired position then pulling the hide up. Be sure the blade faces away from the pulling hand. Slits should be made all around the parameter of the hide approx. ¼” in and ½ to ¾” apart.

6). Now starting at the top of the corner, or neck-end of the hide, lash your cordage to the corner of your frame and start threading the cordage through the slits you have created. I generally go with an “over-up-down-and-around the frame” lacing pattern. This runs the cordage 1 or 2 holes under the hide and gives it strength and stability during the fleshing and de-hairing process.

7). Continue the lacing pattern all the way around from a top corner to the bottom. Once you have reached the bottom or the butt-end of the hide begin to tighten the lacing. You will want to pull and adjust downward away from the neck to stretch the hide lengthwise.

8). Once you get to the other side continue to tighten and stretch the hide widthwise. This helps even out the tension in the lacing and centers the hide in the frame.

9). Now you have laced the hide in your rack…

10). Be sure to get firm, not tight, tension all around by going back and re-stretching your lacing to ensure a taunt fit in the frame.
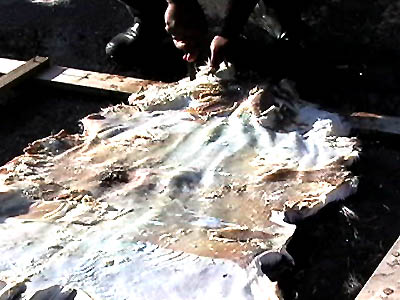
11). Starting at the neck, start removing the fat, meat, and membrane that was left on during the skinning process. Keep the rounded part of your razor-sharp flesher perpendicular to the surface of the hide or you may score, or worse yet, cut a hole in your hide…quite a headache when that happens. Use a vertical elliptical stroking motion.
The idea is to remove the membrane(hypodermis) and expose the pearly dermis underneath the membrane, flesh, and fat. Remember to keep a sharp blade on your fleshing tool!

12). When you come to holes be very careful and gentle when removing the unwanted material from the hide. You do not want to catch and rip a bigger hole and ruin your work so far. You must scrape in the direction of score marks when you come across them. So if a score mark or, cut mark, is horizontal then you must scrape in a horizontal direction or you may cat the lip of the cut mark and rip a hole.
Score marks and grease burns are the enemy of the buckskinner. Be sure to remove as much fat as possible. As the hide starts to dry, especially on a hot day the fat will start to cook the dermis underneath making it weaker in those areas and may produce unwanted holes in the end product. If you have carefully, and respectfully removed the hide from the harvested animal by “fisting” the hide off you should have no score marks.

13). Some areas you can just pull the unwanted material right of without scraping…

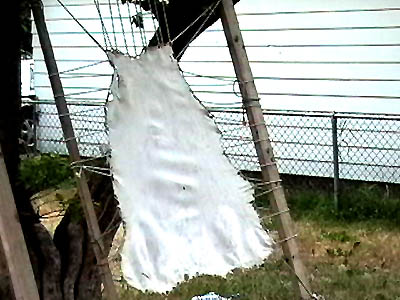
14). Being careful not to work too close to your lacing or you will cut them; The finished de-fleshed hide should be a somewhat pearly white. At this stage you will want to let the hide completely dry. If the weather cooperates you begin the next phase of de-hairing in 24 hours.

15). Day 2: Finishing up
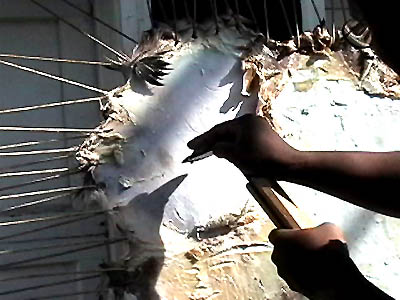
After the hide has thoroughly dried (the flesh side will be of a cardboard consistency all over) turn the frame over and begin carefully using the edge of your scraper to create a horizontal bare spot on the hair side. Be careful from here on out! If you go to far you will cut right through the paper-dry hide very easily.
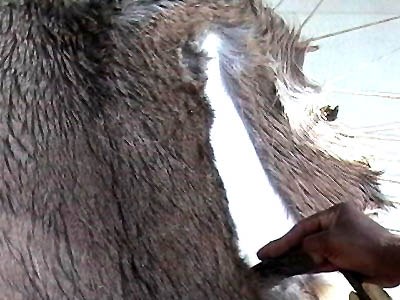
16). After creating an open bare spot on the hair side continue scraping in an elliptical vertical motion with the razor-sharp blade perpendicular (90degrees) to the surface of the hide. The hair should start peeling right off now.
You want to scrape the yellowish epidermal papillary layer along with the hair so that you reveal the white dermis underneath. If you are not thorough in scraping off all of the membrane on the flesh side and all the hear and epidermis on the hair side your hide will not turn out soft!

17). Work very carefully around holes. Sometimes the hair covers them up so be sure to reference the flesh-side as to the location of the holes in your hide. Not doing so will result in a larger hole and a lot of cussing.

18). Do not work to the very edges or you my cut your lacing. This is a headache when this happens…greed I also the enemy to the buckskinner at this phase. Leave about 1 to 1 ½” of hair around. Whew! Still a bit more work to go. But the exposed area is what we want….
19). This step is optional But it will help make sure your finished piece is velvety-soft: Take your piece of pumice stone or medium grit sand paper...

20). sand both sides of your hide to remove any remaining unwanted layers and to begin to bring out the loft in your hide. At this stage you will see and feel the transformation starting to occur.

21). Now with a wet towel moisten the hide all around the parameter using the hair outline as your guide. Take your very sharp blade or utility knife and using the hair outline as your guide carefully cut out your hide from the frame…
22). In this stage it is now rawhide and has many uses. It can also be parchment. Very papery but though.

23). You can now roll it up and store it for future use if you wish, or continue to the next phase…

24). Step 3: Braining
This is where the magic happens! Take your 2 gallons of water and mix the brains together to get a pink-grey soupy mixture. You can also blanch the brains in approx. 1 gallon of water to kill any bacteria, or you can use the brains raw.
25). Now take your hide parchment and submerge it in your brain solution. Warning: The braining solution attracts tons of flies so work quickly or be sure to keep your solution covered when not in use….otherwise, you will end up with a brainy fly-soup…eeeew!

26). Let your hide soak up the brain-juices for about an hour or so. After your hide has been thoroughly soaked it will be come a floppy-soppy mass similar to overcooked noodles. Then swish it around squeeze and knead the hide in the solution.
The object is to let the very fine oils of the brains to work through the fibers of the hide. We want to work them in and trap them there to get our fine finished product. Avoid letting your hide sit in the solution overnight…brains have a tendency of spoiling very, very fast. The end resulting smell is…well…hideous!

27). Next, have a rope, or cable lashed to a vertical object like a tree or pole.

28). Pull your hide from the solution, straining as much of it from the hide as you go. now drape your hide around the rope or cable in a cape-like fashion; I have found that draping your hide lengthwise-horizontal gives you more room for the next step.
29). Fold one end over the other start rolling in a downward motion to create a donut. the ends should be tightly wrapped in the center of this hide donut.

30). Next, insert a stout stick into the center of your donut; in this case an axe handle from the local hardware store, but any strong stick will do.

31). Begin rotating the stick, twisting the hide around it…

32). Thus tightly wringing the brain solution from the hide. Pull and twist as you go. Wringing until you cannot go any further. Then undo your tight hide twist, while still maintaining the donut rotate the hide around the rope ¼ turn. Then pull and twist to wring until you can’t again. Undo then rotate….repeat this process until you have wrung the hide out as tight as you can 4 times working around the hide around the rope.
This process forces the braining solution oils through the fibers of the hide. You cannot do this process enough. I generally am able to get away with 4 rotations, but sometimes I find I need to wring out the hide up to 8 times. After you have wrung it out at least 4 rotations, unwrap the hide and stretch it out. Pay particular attention to the edges. A well-wrung hide should start to turn golden yellowish in some of the areas that are completely devoid of solution.
Then I dunk the hide into the solution, while working it around in the bucket until it is saturated again. Then I wring it out again. I repeat the wringing and rotation, and dunking usually 4 times. So far it has worked for me, producing some nice end products

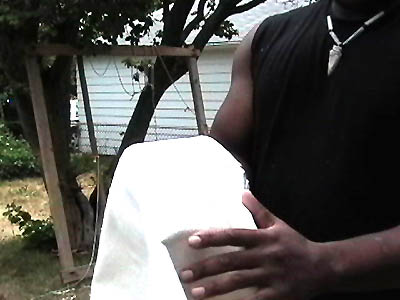
33). Once you are satisfied that the hide is wrung out sufficiently, you can tell this because the once wet, slick, floppy hide is tight, and spongy like a damp terry cloth towel, unwrap the hide and start to stretch it out especially along the edges. In areas that have been stretched the fibers will start to move and start to become white. You are now ready to mend any holes that are present in the hide.
Step 4: Hole Mending
Take your heavy-duty thread and needle and run the thread along your thigh to roll it, if it is waxed thread or artificial sinew…

34). Putting a knot in one end of the thread, begin to whipstitch the holes in your hide, flesh-side up. I generally whipstitch larger holes twice to in sure stability in the next step.
35). Step 5: Racking and Stretching
We are almost done. If you have to take a break and resume at a later time.
Just wrap your damp hide into a ball, put it into a plastic back, and stick it into the fridge or freezer (be sure no one mistakes it as dough or pasta if they happen to pull it from the refrigerator). Doing this will keep the hide damp. At this stage you do not want it to dry without stretching it. This phase is what produces the fine velvet –soft fabric-like leather we have been working so hard for. If you allow it to completely dry out at this stage you will have to re-brain it all over again.
Retrieve your frame. You will now insert slits parallel and along the edge of the hide all the way around just like we did in the beginning. Four separate pieces of cordage works best for this phase. Lace the neck. Then the rump, then the two sides stretching the hide back into the frame. This time not too tight. You will want some floppiness…over stretching in this phase will case pieces of whatever you end up making to want to return to their original size.
If the weather is warm be sure to keep a spray bottle handy to spritz your rapidly drying hide. You must keep it moist.

36). Once the hide is stretched inside the frame, take the stick that you used before in the wringing process and begin to push and work down all over the drying hide. Be sure the stick does not have a point or sharp edges or you will punch right through your work. A flat rounded edge works best.

37). You can even use your hands or fist to stretch the hide in the frame. The object here is to keep the fibers of the hide moving while it dries. That way the fibers cannot set and re-glue themselves back to one another. This is what produces the supple end product….
FYI: Racking the hide and stretching it with the stick is completely optional. After braining the hide, mending the holes, all you need do is have plenty of time to sit and stretch the hide by hand all over until it dries. You can even sit with a friend across from you and methodically stretch the hide by bringing the opposite ends together and simultaneously pulling in opposite directions while rotating around the hide.
I have found that hand stretching not only saves extra work, but also produces a thicker, more elastic end product. However, if you do not mind the extra work, racking and stretching the hide will produce a larger more thoroughly worked piece. I may not be as spongy or thick in the end, but it will be easier to cut patterns out of a racked piece in the end. If it is racked I find I can take short breaks. Ultimately, it is your choice as to how you want to stretch your hide, but you MUST constantly work the hide dry regardless of method used or you will end up with a not-so supple piece and my have to un-rack and/or re-brain it all over again…see, this process is very labor-intensive. Yet, if done correctly, well worth it. Almost done….
38). If the weather is around 75-80degrees it may take only a short time for the hide to be stretched and dried in the rack, about an hour or two. The flesh side tends to dry faster than the hair side. When it is done you will have a snow-white soft, supple hide that is ready to be release from the frame for the final steps.

39). Optional: Using your pumice stone or sand paper, abrade both sides of the hide. This is called buffing and helps lift the fibers a bit and really produces that velvety softness we are after.
40). Carefully cut your dry hide from the frame. If we have been diligent in our efforts thus far we will now have a snow-white, soft, supple piece of leather that is now considered buckskin!
At this stage as long as you do not get it wet, you can make most anything from it. If it gets wet in this stage then it will return to a hard and stiff state that you will have to work dry again. The Native Peoples would use the snow-white buckskin for ceremonial dress, and objects. I have even seen a beautiful wedding dress made entirely of snow-white buckskin!
However, if you are looking to be sure that you end up with soft, supple buckskin after it becomes wet, we have to smoke the hide. So we will have a few more steps left. This not only gives it that mountain-man tan that we see on movies and TV, but it also helps hide our scent when hunting, but most importantly, the smoke works itself through the fibers and coats them so that if your buckskin gets wet the fibers will not dry upon themselves again producing a stiff, hard piece.

41). Note: In place of buffing the hide with pumice or sand paper, you can drape your buckskin around your cable and work it back and forth briskly. This helps dry and lift the fibers as well.

42). Step 6: Smoking
Now just when you thought the sewing was done….
The next step is to sew your buckskin lengthwise from the neck using a whipstitch flesh-side out. Leave an opening at the neck and do not sew the bottom.
If you are truly sick of sewing clothes pins work as well. Then end pattern produced by the clothespins and smoke gives character to the finished piece I think. Sewing produces a nice off-color border as well.

43). Depending upon the method of smoking you may need to create a skirt out of heavy fabric. This will help protect your buckskin from the heat and scorching. The skirt is a rectangular tube you can either sew or clothespin to the neck of your buckskin.
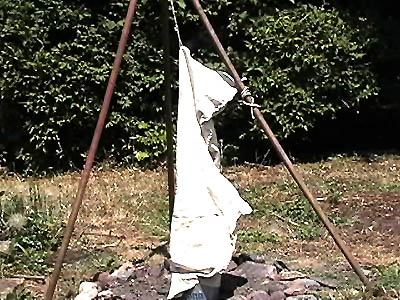
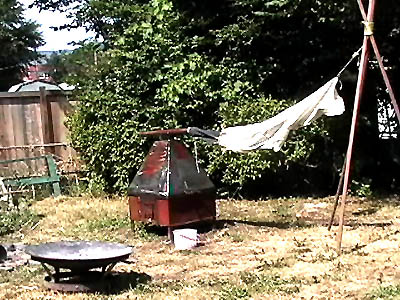
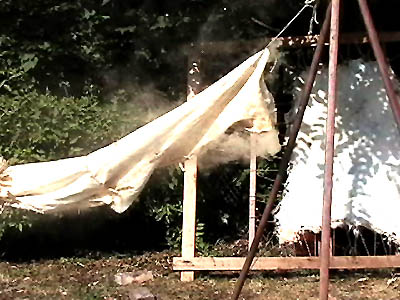
44). Here we have a primitive smoking set up:
I built a tri-pod and hung the open end of my buckskin from the center over a bucket or 2’x2’ deep pit of wood coals and grass clippings, punky wood, or dry leaves. I find that dry leaves from the Fall raking work very well.
YOU MUST MONITOR YOUR HIDE SMOKING AT ALL TIMES! A flare up can occur and scorch all your hard work. Err on caution and safety!
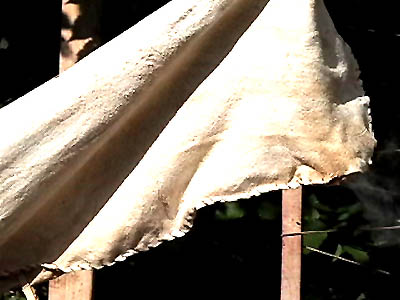
Smoking can take from 3 – 8 hours. The longer you smoke your hide the darker the color. If you want a white or off-white smoked hide then only smoke your buckskin for a little while. A little bit of smoke will be enough to waterproof it. If your buckskin becomes wet after smoking it. Allow it to dry laying flat. Once dry only a little bit of pulling and buffing it will bring it back to its original state of soft and suppleness.
45). This is a less primitive set up. I had a welder-friend of mine create this smoker. Notice the double-ended tube. This was designed to be able to smoke up to 4 hides at once. I have also seen old wood stoves converted into hide smokers. My first few hides I smoked with an over turned aluminum trashcan and some heating tubes That worked fine but I lost a lot of smoke from the holes I had to make to punch the heating tubes through, so I had my buddy create this one.
Notice the denim skirt that is attached to this hide.

46). You will want to be sure that the sack you created with your buckskin for smoking is open and not hanging flat or you will get uneven coloration
47). You will want a lot of smoke to color quickly.

48). Here I have taken 2 hides and sewn them together and fastened a skirt to the neck. this is recommended when you are intending upon making something, like a shirt or vest, from multiple pieces of buckskin and want even color.
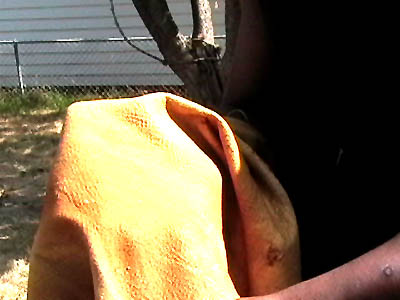
49). I can tell when a hide has reached my desired level of tan or brown when I start to see coloration coming through the other side. Some may even turn the hide right side out and smoke the other side. I am content with smoking only a single side…the hair side.

50). When you have reached the desired level of color. Take your hide down and undo the stitching or clothespins…
51). Voila! Your very own brain-tanned buckskin.